This is the 4th post in the category Azure DevOps Fundamentals
of the blog post series on working with Azure DevOps
. In this post the I will demonstrate how to create an Azure Service Connection in an Azure DevOps Project.
Since it much more fun to do research and play with technology in collaboration with others, Wesley Camargo
will be covering some of the topics on he’s blog
, while other topics are covered by my here. Naturally the all related posts will be referenced between the two blogs.
What is an Azure Service Connection
An Azure Service Connection or officially called ‘Azure Resource Manager Service Connection’ allows for Pipelines in Azure DevOps to connect to Azure for the purpose of executing Azure Resource Manager related tasks. For example, to deploy infrastructure using the Infrastructure as Code method. There are 4 authentication methods available to choose from when creating an Azure Service Connection. Each method allows Pipelines in Azure DevOps to connect to Azure using its own authentication approach.
Service principal (automatic)
Service principal (manual)
Managed identity
Publishing Profile
Since the Service principal (automatic) method is marked as recommended in Azure DevOps I will cover this method as it would fit best in being part of the Azure DevOps Fundamentals
category.
When used, this method creates a n Azure Service connection that is composed of two parts. One part resides in Azure DevOps and the other one resides in Azure Active Directory.
The first part contains all the necessary configuration to be able to use the service connection as part of Pipelines in Azure DevOps. The second part is actually an App registration
(see it as a traditional service account). This app registration is created in the background during the Azure Service Connection creation process. The next chapters depict and explain both the first and the second part.
How to create a new Azure Service Connection in Azure DevOps
Before jumping in, lets get the prerequisites clear.
Prerequisites
In the Azure DevOps Project you need to be signed in as the owner of the Azure Pipelines Organization
In Azure you need to be signed in as the owner of an Azure Subscription (the one you want the service connection connect to)
If multiple accounts are used for the previous two points make sure you sign-in with both accounts in the same browser instance
In Azure Active Directory the user in question must have Directory Read role assigned
In Azure Active Directory the user in question must have at least one of the following roles, which role is needed depends on the type of user and the Users can register applications setting.
Application Administrator
Application Developer
Cloud Application Administrator
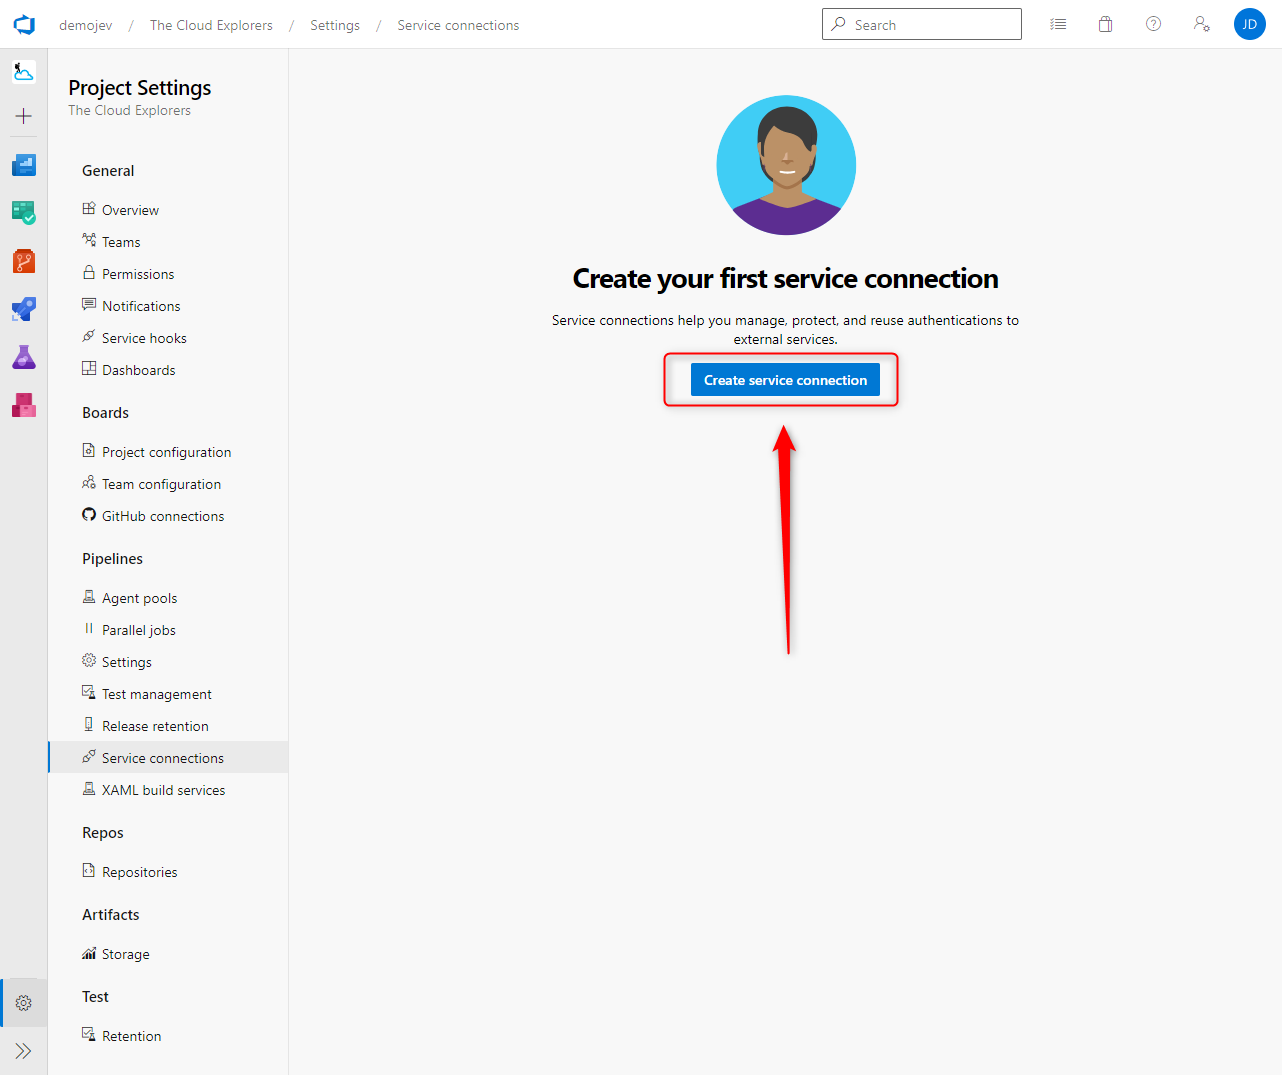
Make sure you are on the landing page of the Azure DevOps project in question. Click in the top left bottom corner on Project settings link.
Project settings
In the left hand navigation menu click on Service connections.
Service connections
Now click on the Create service connection button in the middle of the screen.
Create service connections
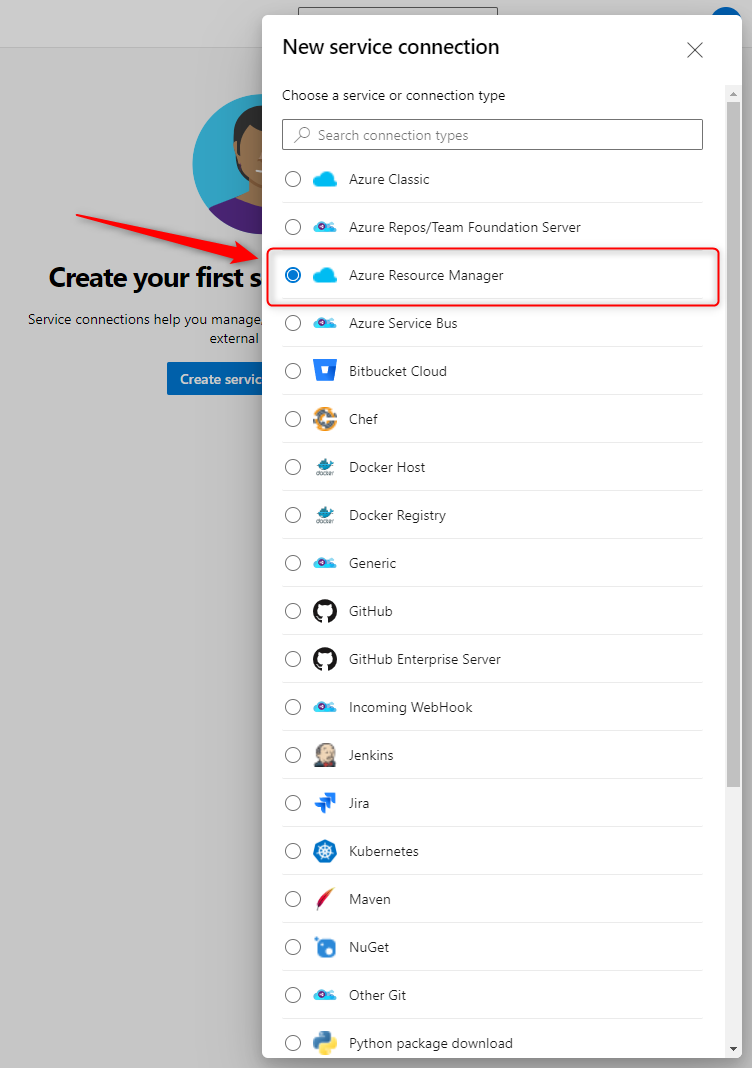
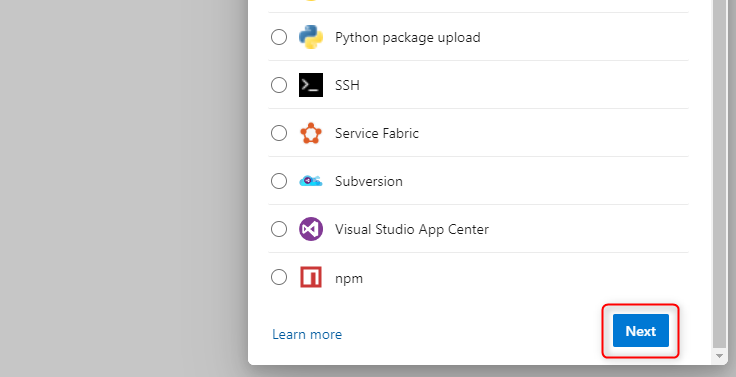
On the New service connection page select the Azure Resource Manager option, then scroll all teh way down and click Next.
New service connections
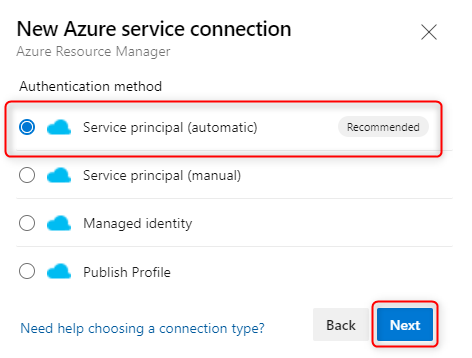
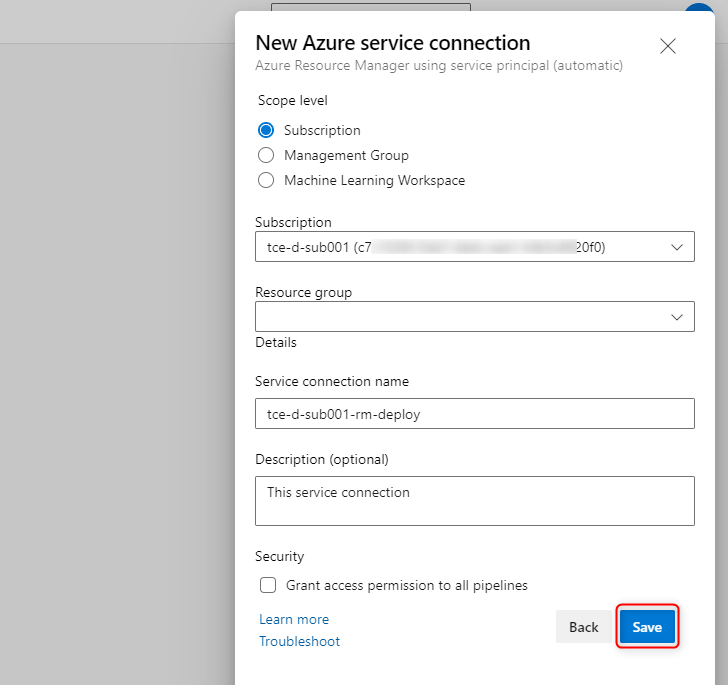
Make sure the Service principal (automatic) option is selected and click next.
New Azure service connection
Leave the scope set to Subscription.
In the Subscription dropdown select the desired subscription.
Leave the Resource group dropdown empty to set the Service Connection permission scope at whole subscription level or if lesser scope is desired select an appropriate resource group.
Give the service connection a logical name and provide a proper description.
Uncheck the checkbox Grant access permission to all pipelines as if left the service connection will be usable by all pipelines which can be a security risk.
Ensure that the results from steps 6 to 10 look similar to the following image and click the Save button.
Filled New Azure service connection
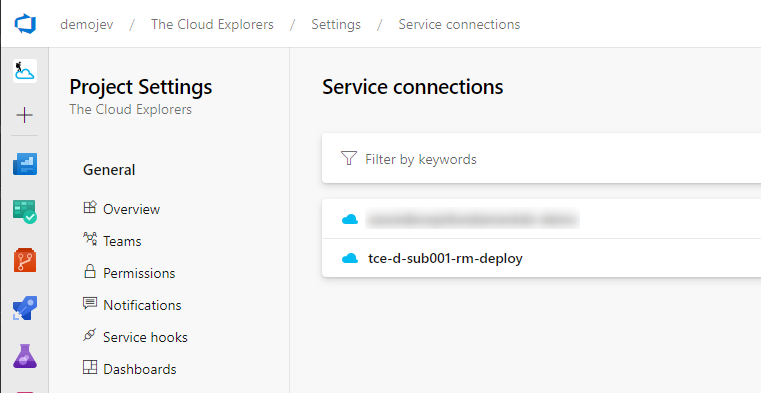
The Azure Service Connection is now created and is visible on the main screen.
Newly created Azure service connection
The two parts of an Azure Service Connection
With the service connection present lets have a look at the earlier mentioned ’two parts’ that make up an Azure Service Connection.
First part - Azure DevOps Configuration
Repeat step 1. and 2. from the previous steps and navigate to Service connections.
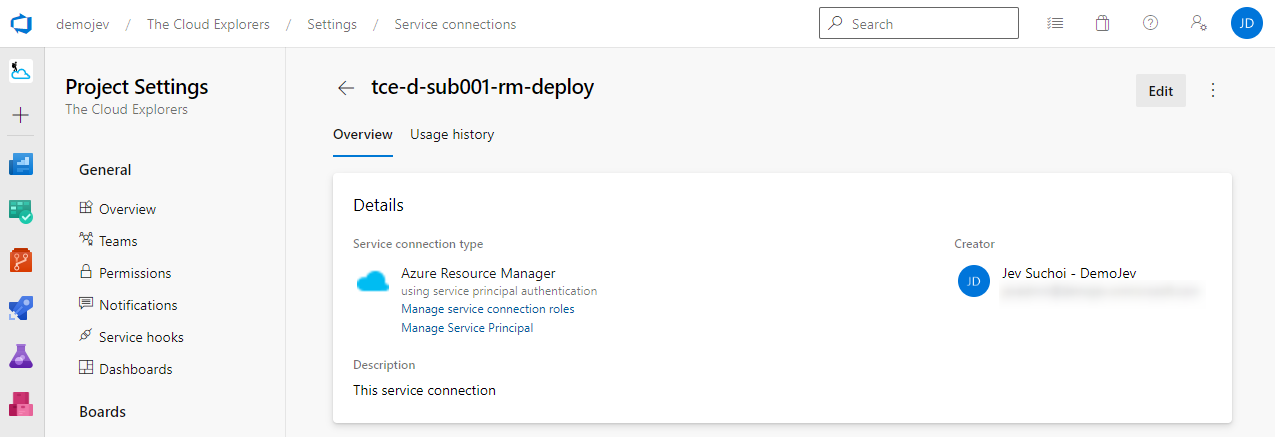
Click on the service connection that was created during previous steps, you should see a similar screen as show below.
Newly created Azure service connection
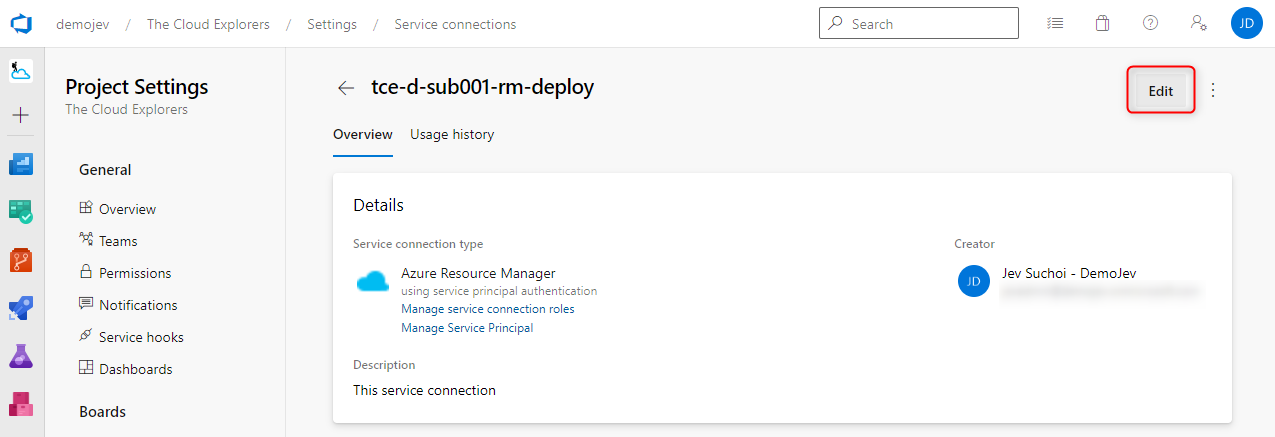
In the top right corner click on Edit.
Azure Service Connection Edit button
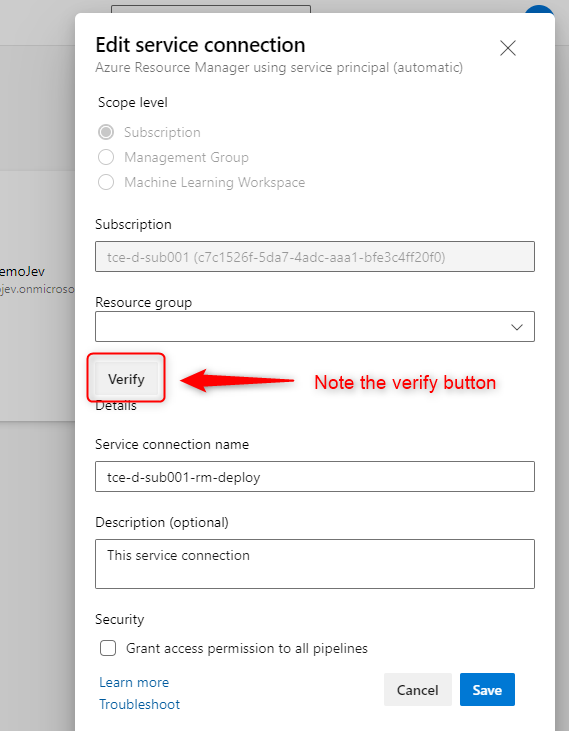
The in the previous chapter mentioned ‘first part’ that resides in Azure DevOps is now shown. As mentioned it contains the configuration settings.
First part fo the Azure service connection
Note the Verify button. This button is used to verify that the credentials used to connect this Service Connection to Azure are still valid. Keep this button in the back on your mind as it has an additional function which I will explain further on in this post.
Close the Edit service connection view to exit the first part of the Azure Service Connection.
Second part - Azure Active Directory App Registration
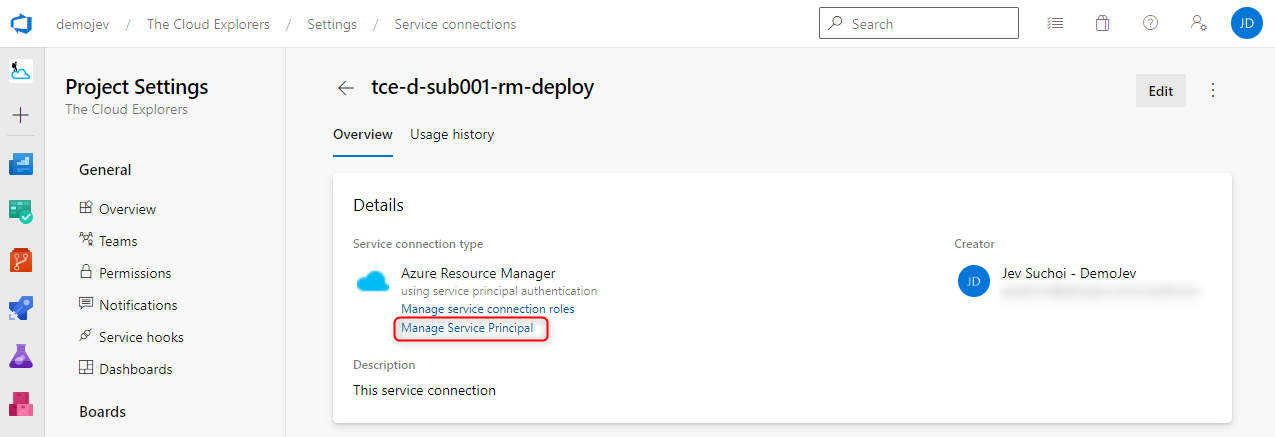
Click on the Manage Service Principal link under the Service connection details.
Manage Service Principal
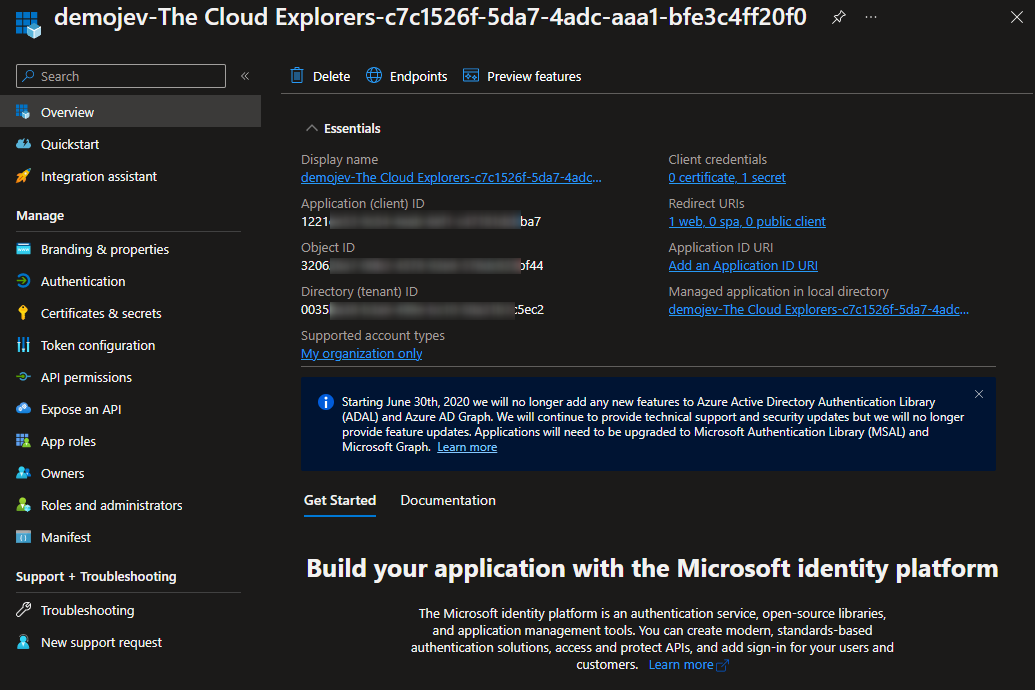
This links directly to the App registration that is the ‘second part" of an Azure Service Connection. Result is shown in the following image.
Second part the App registration
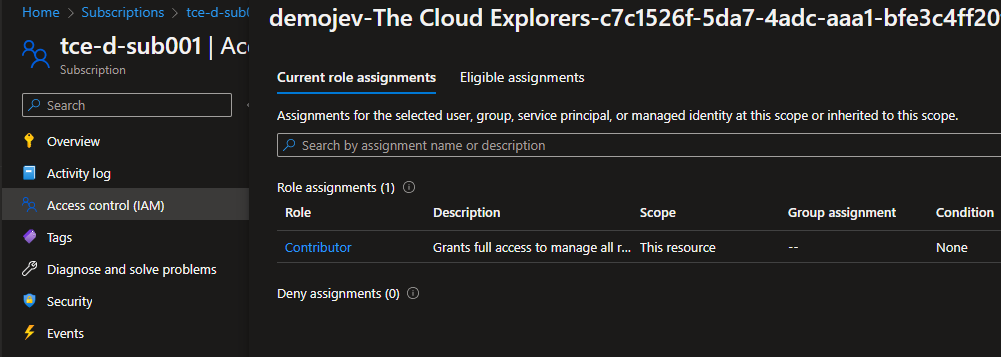
Whats is show here is the actual identity that is granted permissions to the Subscription, as you can see in the following image this identity has Contributor permissions to the Azure Subscription in question. In case you are wondering how to quickly check permissions. From the Azure Service Connection screen use the Manage service connection roles located above the Manage Service Principal link.
Second part the App registration
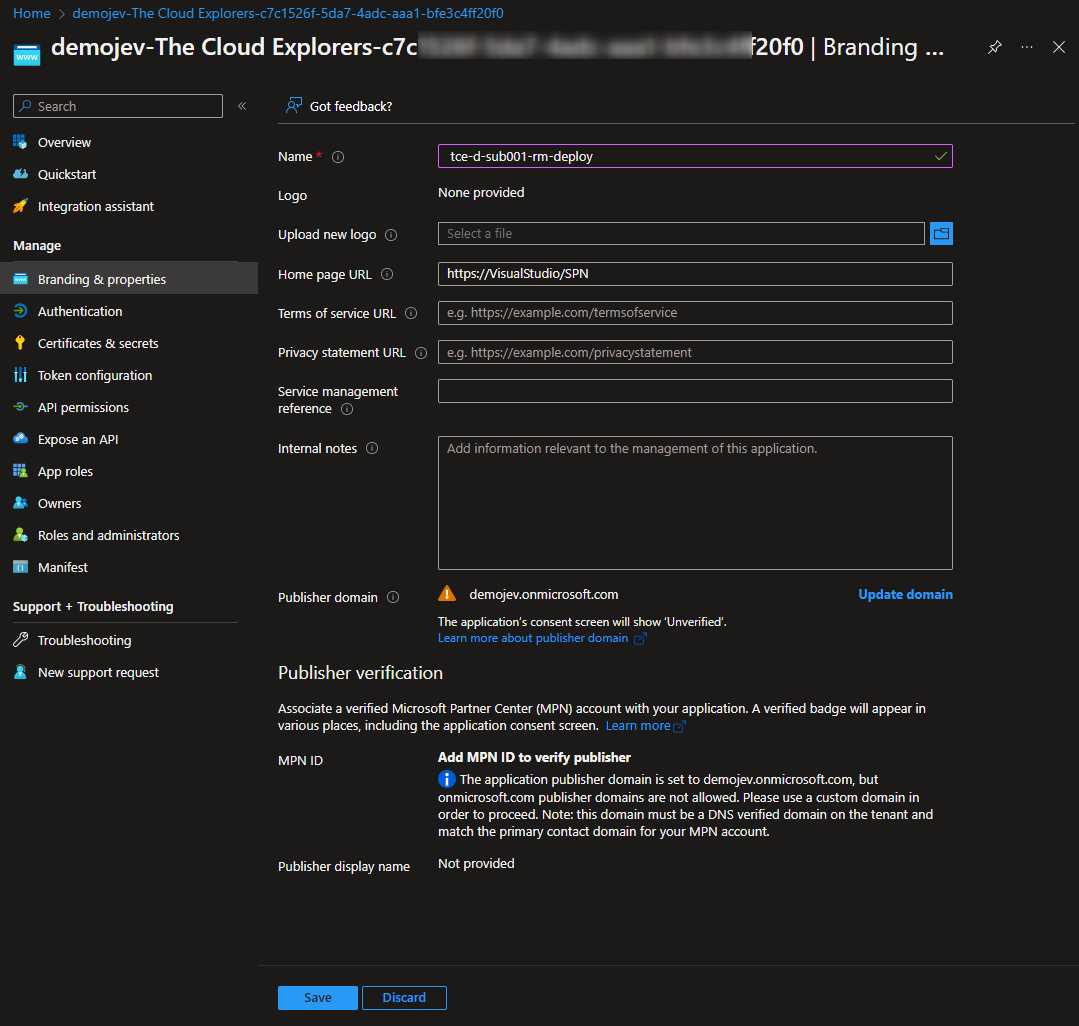
Notice it’s dreadfully awful name. This name is composed of the name of the Azure DevOps Organization, followed by the Azure DevOps Project and finally the guid of the subscription. The problem with this combination is that it is reused. So when you create multiple Azure Service Connections to the same subscription they will all have the same name and will be impossible to keep apart. So I strongly recommend renaming the App registration by navigating to the Branding & properties option, adapting the Name field to something more unique, for example the name of the service connection and saving the changes.
Change the Name of the App registration
Now navigate to the Certificates & secrets option. You should find the client secret that has been created to authenticate the Azure Service Connection. By default this secret is valid for 2 years. Now remember the Verify button from the previous chapter? This is the moment to use it. In case this secret is already expired or is close to becoming expired, simply navigate to the settings where the Verify button and click it to refresh the service connection secret for another two years.
Wrapping up
And there you have it, How to create a new Azure Service Connection in Azure DevOps. If you are interested in the reference material used to make this post, please visit the following links.